
Setup Wizard
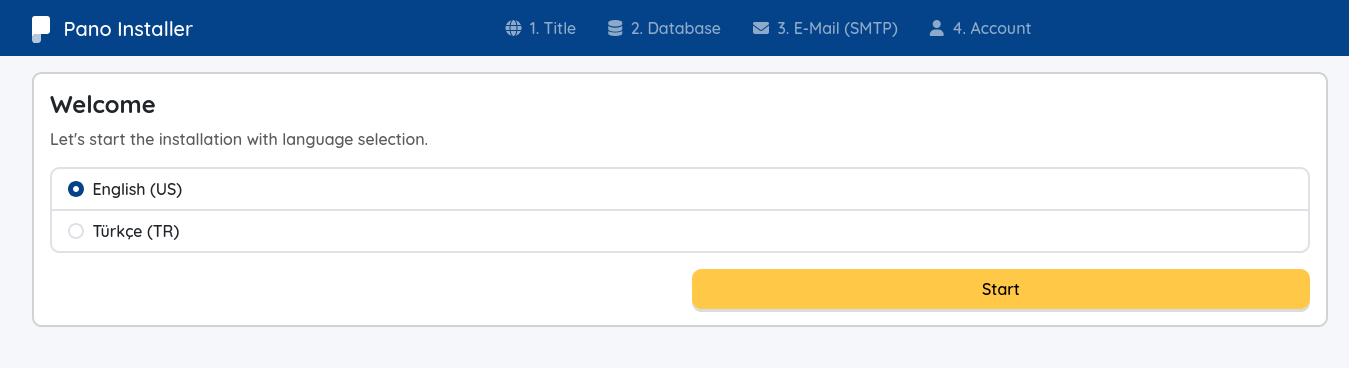
Once Pano starts, open your browser and navigate to:
http://<your-server-ip>/The address depends on how you installed Pano: the installer and Docker use port 8088 (
http://<your-server-ip>:8088/), the manual.jaruses port 80. Make sure that port is open and not used by another application.
Installed with
--mariadbor Docker Compose? The database step is already filled in; leave the password empty to keep it.
IMPORTANT
Using Cloudflare? Pano serves plain HTTP on port 80 by default, so Cloudflare must be set to SSL/TLS mode: Flexible — otherwise you'll hit redirect loops or 521/525 errors when opening your domain. See the dedicated Cloudflare guide → before continuing.
You’ll see the Setup Wizard, guiding you through five simple steps:
Language Selection & Usage Mode
Choose your preferred language, then answer "How will you use Pano?" on the same screen:- Website — a public website only (the classic Pano experience).
- Server management — Minecraft server management only: the panel is the product, Posts, Tickets and View (themes) are turned off, and the public pages redirect to
/panel. - Both — website + server management. Recommended, and preselected.
Nothing is locked in here — you can change it later in Panel → Settings → Platform → Preferences. It is stored as the
usage-modekey inconfig.conf.
(By proceeding, you agree to Pano's Terms & Conditions and Privacy Policy.)Website Configuration
Set up your website details (site name, URL, etc.).
In Server management mode this step asks for a panel name instead of a website name, and the description field is hidden.Database Setup
Enter your MySQL or MariaDB credentials.
Default table prefix:pano_(you can change it if needed).Portable DB Option: On Windows (x64 or ARM64) systems, you'll see an option to use a Portable Database. Selecting this will cause Pano to automatically download, configure, and manage a portable MariaDB instance for you.
SMTP Settings (Optional)
Configure email sending if you wish.
This step is optional, and if you decide to skip it — no worries!
You can always enable or update SMTP settings later inside the Panel → Settings → Platform section.
(However, some features like password recovery may not work until it’s configured.)
No mail server? Choose Pano Mail here: sign in with your Pano account and e-mail works right away, free, with no set-up. See Pano Mail.Account Linking & Admin Creation
- If you already have a Pano Account, you can link it here by pressing connect button — your email and username will auto-fill.
- Otherwise, create a new admin account (don’t forget your password — it’s required for login!).
- With a linked account you can tick Back up daily with free Pano Backup to have daily backups from the first day. See Backups.
Moving from another Pano? The Transfer button of the wizard offers Restore from a backup file: choose a
.panoarcfile and Pano restores that site. See Backups.
To finish the setup, click Finish.
Pano will finalize the installation and automatically redirect you to your new admin panel.
You'll now be able to create posts, connect your Minecraft server, install addons, change themes, and much more!
Connecting Your Minecraft Server (Optional)
To enable game integrations and connect your Minecraft server to Pano, you'll need to install the Pano MC Plugin.
What is Pano MC Plugin?
The Pano MC Plugin acts as a bridge between your Minecraft server and Pano, enabling:
- Secure WebSocket communication (RSA + AES-256 encryption)
- Real-time player data synchronization
- Automatic plugin detection and integration (AuthMe, permissions, etc.)
- Event system for in-game to web communication
Installation Steps
Download the Plugin
- Visit Pano MC Plugin Releases
- Download the appropriate JAR file for your server platform:
pano-spigot-<version>.jar— For Spigot/Paper/Foliapano-bungeecord-<version>.jar— For Bungeecordpano-velocity-<version>.jar— For Velocitypano-fabric-<version>.jar— For Fabric (goes into themods/folder)
Install the Plugin
- Place the downloaded JAR file in your server's
plugins/folder - Restart your Minecraft server
- Place the downloaded JAR file in your server's
Connect to Pano
- After restart, open your Pano Admin Panel
- Open the server switcher in the top bar
- Click the + button beside it to add a new server
- A connection modal will appear with step-by-step instructions
- Follow the steps shown in the modal to link your Minecraft server
- The plugin will automatically establish a secure encrypted connection
Verify Connection
- Once connected, your server will appear in the server switcher's list
- You should see server status (online/offline), player count, and other information
- The connection is now active and ready for integrations
Note: You can connect multiple Minecraft servers to a single Pano instance.
Supported platforms: Spigot, Paper, Folia, Purpur, Bungeecord, Velocity and Fabric.
What's Next?
Once your server is connected, you can:
- Enable game integrations (like AuthMeReloaded)
- View real-time player statistics
- Manage players from the web panel
- Sync in-game events with your website